|
|
|
|
|
|
|
|
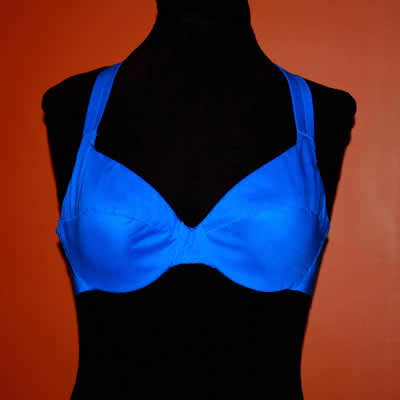
STEP 1 - PLANNING
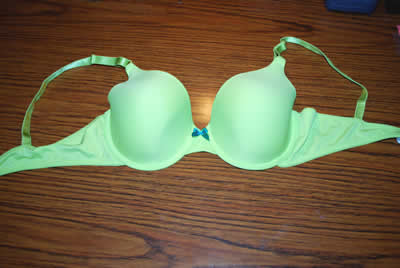
Determine the style of bra you want to make. Do you want the straps
configured in a halter style? Lingerie style? Some combination
of the two?
Next choose a lingerie bra that fits and supports you well. Straps
are not as important as cup size and fit. Get a bra that has some
sturdiness to the cups. No flimsy fabric-only cups! Underwire
bras are recommended.
Next choose your fabric. You will need enough to cover your bra
and a matching belt if desired. I have found that 1 yard of fabric
will cover a belt and bra for sizes up to C cups. Get more if
you are a larger size or want to make a belt that is curved or
wider than about 2.5 inches.
|
|
|
|
|
|
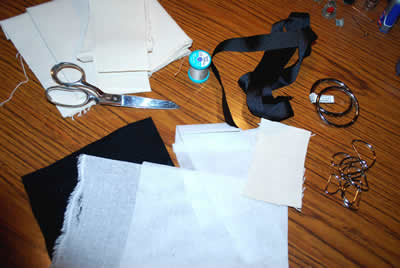
STEP
2 - ORGANIZING
Assemble the materials you will need for the project. Fabric, shears,
pins and needles, upholsery or craft thread, regular thread that
matches your fabric. Yardstick or tape measure, interfacing, felt
or buckram for adding sturdiness to the cups if needed.
Canvas for making wide straps. If your straps will be made from
ribbon, get grosgrain in the width desired.
Steel rings if needed. |
|
 |
|
|
|
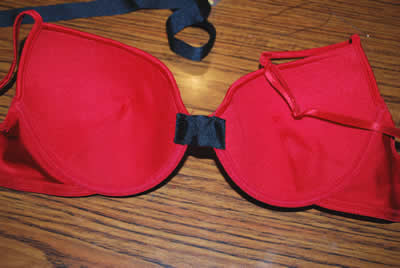
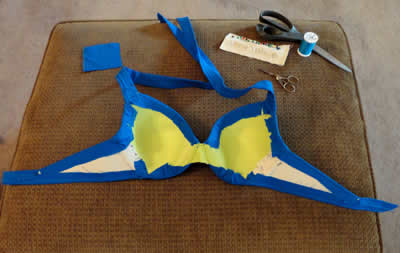
STEP
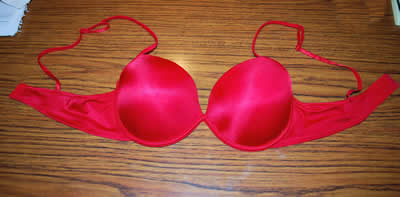
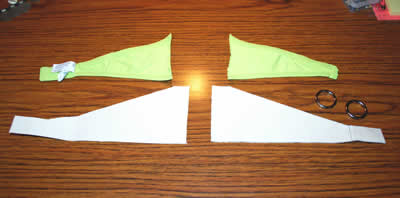
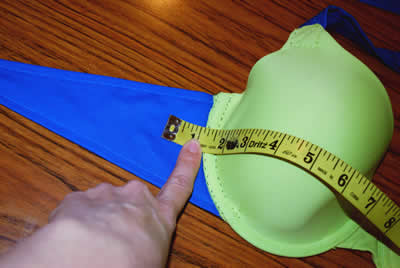
3 - CENTER MEASUREMENT
This step can be skipped if your bra fits you well. But if you need
to use a bra that isn't a perfect fit and the cups are too close
together or too far apart, you may need to make an adjustment here.
The bra in this photo has almost NO separation between the cups.
(Who is built like this???)
Likewise, if the cups are too far apart, you can do this step the
same way, only making them closer together instead of further apart.
|
|
|
|
|
|
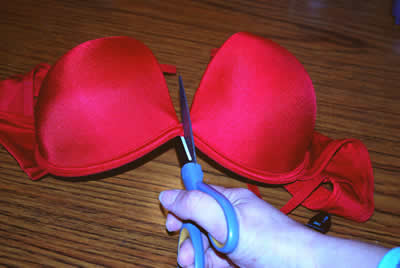
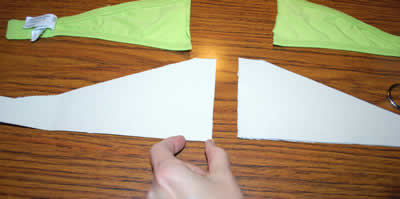
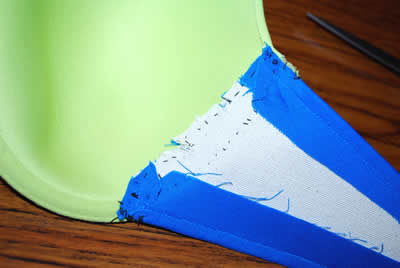
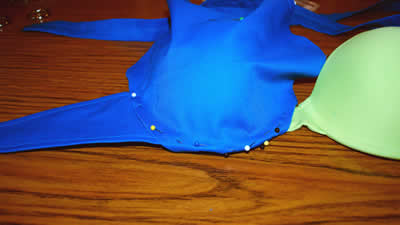
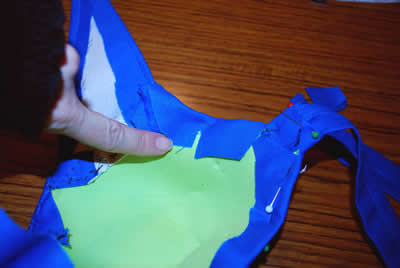
First,
cut the cups apart in the center.
For cups that need to be made closer together, you can cut in the
middle and simply sew the pieces back together by overlapping to
make them the correct distance apart. Add a piece of grosgrain ribbon
for extra sturdiness. Sew with upholstery thread.
|
|
|
|
|
|
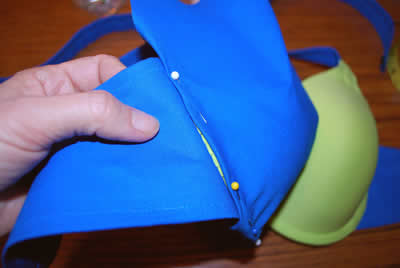
| For
cups that need to be further apart, take a piece of grosgrain ribbon,
sew one end to one of the cups and the other to the other cup. Sew
this part down well with upholstery thread. This part of your bra
takes a lot of stress and you don't want it to come apart on you.
|
|
 |
|
|
|
|
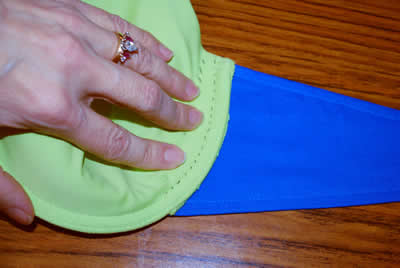
The ribbon can be sewn
either to the inside of the cups or the outside. It doesn't matter
as long as it is attached securely. Sew around the underwire to
make sure that you aren't pulling on the cups themselves.
Fold ribbon ends under so they don't come unraveled and stitch
down.
|
|
 |
|
|
|
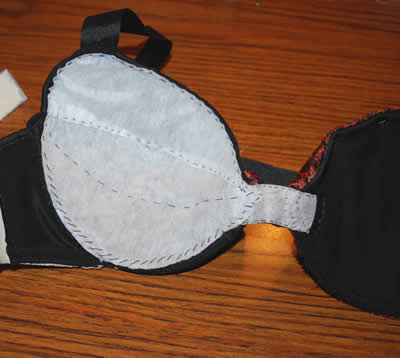
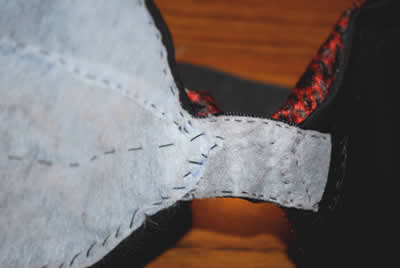
STEP
4 - ADDITIONAL SUPPORT
If you need to add some sturdiness to the cups themselves, now is
the time to add your interfacing, felt or buckram. In this example,
I have sewn interfacing to the INSIDE of the cups, but you can sew
it to the outside as well or instead.
Interfacing works well inside, but felt and buckram are better on
the outside of the cups because they add bulk.
Cut curved pieces and sew down to the cups. Trim excess off. You
don't want folds or gathers.
Remember that heavy embellishments will need a very sturdy bra.
If you will be using coins or other heavy or metal objects for decoration,
DO NOT SKIP THIS PART. Heavy embellishments will pull your bra out
of shape if it isn't sturdy enough. |
|
 |
|
|
|
| If
you have adjusted the center of the bra, add some interfacing to
make this a bit stiffer. |
|
 |
|
|
|
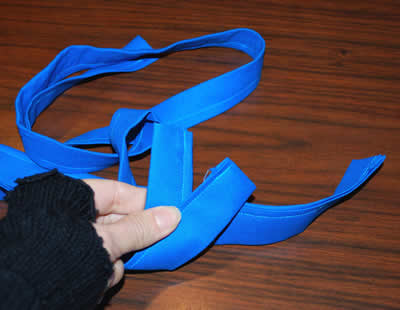
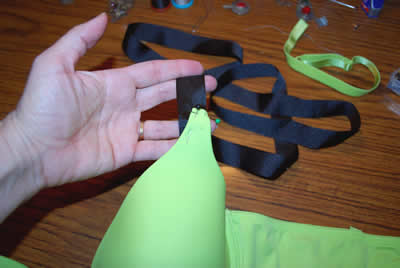
STEP
5 - SHOULDER / NECK STRAPS
Stretchy bra straps do not support either you or a decorated bra
well. Replace flimsy lingerie shoulder straps with sturdy costume
straps. Cut off the shoulder straps in front and back. Leave the
midriff strap on for now.
Next determine how long your shoulder straps need to be. Halter
style straps will need to be long enough to tie. Criscross straps
will need to be even longer. Remember that your costume straps WON'T
BE STRETCHY and increase your length accordingly.
Next determine how long your shoulder straps need to be. Halter
tie style straps will need to be long enough to tie. Criscross straps
will need to be even longer. Remember that your costume straps WON'T
BE STRETCHY and increase your length accordingly. |
|
 |
|
|
|
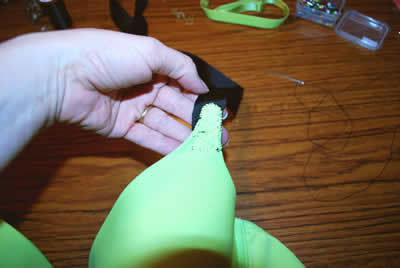
Once
you have determined width and length of shoulder straps, cut your
ribbon or canvas to the correct size/length and cover with your
decorative fabric first. You can machine stich or handstitch this
fabric into place with matching thread.
In this example, my straps are about 1 inch wide, made from ribbon,
and will be threaded through steel rings.
If you will be making a bra that is decorated with very heavy embellishments
or lots of metal, you may want to consider making your straps wider,
or pad them when you are finished to make them more comfortable.
Likewise, well-endowed dancers may want to consider wider shoulder
straps to help distribute weight so the bra is more comfortable.
|
|
 |
|
|
|
|
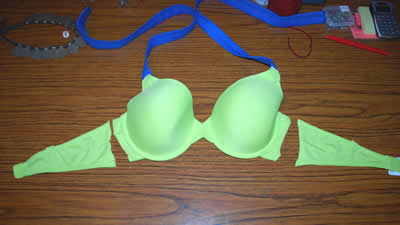
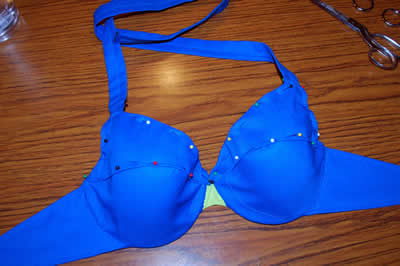
After you have covered
the straps with your decorative fabric, pin them into place in
the front. Don't sew them yet. You will need to try the bra on
with the straps pinned in place to find the proper angle for the
front. If you are making a lingerie bra into a halter configuration,
the angle of the straps will be different than the original placement.
Repin the straps into proper place if you need to.
(Please note that this photo shows plain ribbon straps, they are
not covered in decorative fabric.)
|
|
|
|
|
|
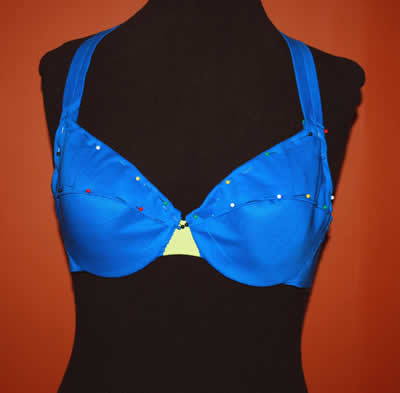
Once the
straps are pinned at the correct angle, sew them into place. Use
upholstery thread and make sure they are sewn very securely.
Try the bra on again and make sure that these straps are positioned
correctly. If not, undo them and resew. This does not have to look
neat.
(Please note that this photo shows plain ribbon straps, they are
not covered in decorative fabric.)
|
|
 |
|
|
|
|
STEP 6 - MIDRIFF
STRAPS
Even if your bra is made from a nice fabric such as velvet, don't
skip this step. Stretchy straps do not support a costume bra well
and do not look professional.
Next cut off the midriff (back) straps. I generally leave about
1 to 1.5 inches of the original strap remaining so I can see their
original placement. These stubs will be cut off later.
|
|
|
|
|
|
Make
your replacement straps. In this example, I am making three-quarter
straps and will be using metal rings.
If you will be making straps to go all the way across your back,
be sure to measure correctly and remember that the new straps will
not stretch.
Tie straps will need to be even longer. |
|
 |
|
|
|
Cut
new midriff straps out of canvas or other heavy material. Leave
at least 3 EXTRA INCHES at the end that will be attached to the
cups. You can trim excess later, but you will need extra to make
sure that the straps are correctly placed and attached at the correct
angle.
Now cover your straps in your decorative fabric. You can machine
stitch or hand stitch with matching thread. |
|
 |
|
|
|
Once
the new midriff straps are covered with decorative fabric, you can
pin them in place. Pin them to the inside with the stubs of the
original straps on the outside. Pin from the outside as close to
the underwire as possible.
(Please note that this photo shows plain canvas straps, they are
not covered in decorative fabric.)
|
|
 |
|
|
|
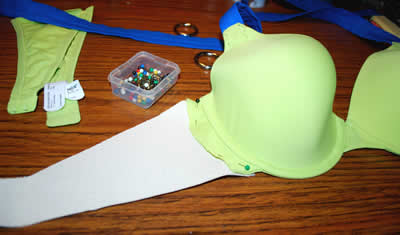
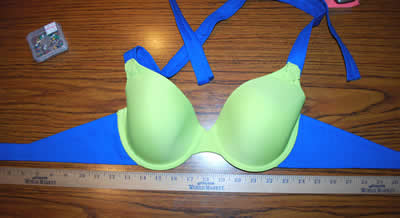
Take
care with placement of the new straps. Pin them in place so that
when the bra is placed along a straight edge, i.e., a yard stick
or the edge of a table, etc., the straps and bottom of the bra line
up in a straight line. This is a good starting point for positioning
the midriff straps.
If you pin the straps in the exact spot where the old stretchy ones
came off, they will usually NOT BE AT THE RIGHT ANGLE.
After you pin them in place you must try the bra on to make sure
that the new straps are correctly placed. If not, repin and try
it on again. Repeat until they are in the right position. |
|
 |
|
|
|
Next
sew the straps down securely with upholstery thread. Sew along both
the inside edge and the outside edge of the underwire.
Once you have sewn the new straps down. Try the bra on AGAIN to
make sure everything is in the right place.
Now you can trim any excess canvas/ fabric from the inside. Leave
a bit of excess along the edge. You may need to snip the canvas
to wrap around the curve of the cup.
Sew any loose ends down on the inside. This does not have to look
neat. |
|
 |
|
|
|
| Cut
off the stubs of the origial straps. Check to make sure that the
outside edge is sewn down securely. |
|
 |
|
|
|
STEP
7 - COVERING THE CUPS
If your bra is made from velvet or another nice fabric and you won't
be covering the cups, you can skip this step. Be sure that your
straps are attached in such a way so that no unattractive stitching
shows, or add wraps of decorative fabric to hide unsightly connections.
You can go on to step 8 or 9.
If you will be covering your bra cups, continue with this step.
Measure your bra cups for covering. Measure across the fullest part
of the cup adding at least one to two inches on each side. This
will be the measurement for the circular piece of fabric.
|
|
 |
|
|
|
Cut
a roughly circular piece of decorative fabric in the measurement
you just made. For this example, this peice needs to be 10 inches
across. This doesn't have to be perfect, close to circular will
do. This measurement will seem much bigger than necessary, but DON'T
SKIMP here.
If you are in doubt, MAKE IT LARGER.
Cut two pieces. |
|
 |
|
|
|
Starting
at the side of one cup, fold the fabric under along the wire and
pin along the outside. Next fold the fabric under the bottom of
the cup and pin in place.
It should fit along the curve pretty well. If it doesn't seem right
to you the first time, keep working with it until it looks fairly
smooth. This edge needs to look nice and neat since it will show
on the finished piece.
|
|
 |
|
|
|
| Next
pin up along the wire toward the center of the bra. Fold the center
edge under and pin in place. Now you should have the entire wire
edge of the fabric pinned into place. |
|
 |
|
|
|
| Fold
the edges as neatly as you can and pin in place, making sure to
cover all the original bra. This edge will show on the finished
piece. |
|
 |
|
|
|
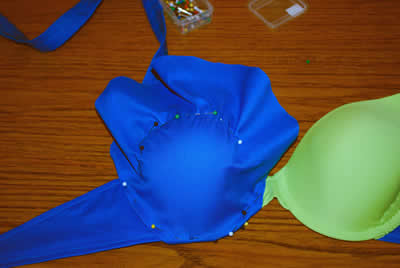
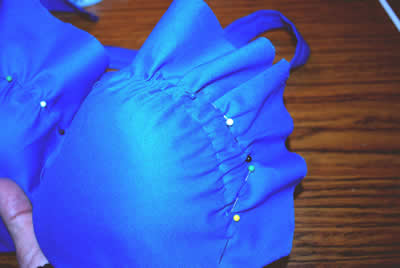
Next
gather and pin along what I call the 'crest' of the cup. This is
not the top edge of the cup, but about three quarters of the way
up.
Gather and pin until the entire piece of fabric is pinned across
the crest of the cup. Pin through the fabric to the cup itself.
|
|
 |
|
|
|
| This
photo shows about where you want to gather and pin. This is the
crest of the cup. |
|
 |
|
|
|
Now
that you have gathered and pinned along the crest of the cup, sew
the fabric down along the wire edge of the cup using matching thread.
Sew the fabric down so that there is no original bra showing.
Don't sew the top edge yet.
While you are covering the bra cups, it's really important to remember
not to pull the decorative fabric too tight. If you sew this fabric
down pulling it too tightly, the cups end up misshapen and will
not fit correctly. |
|
 |
|
|
|
|
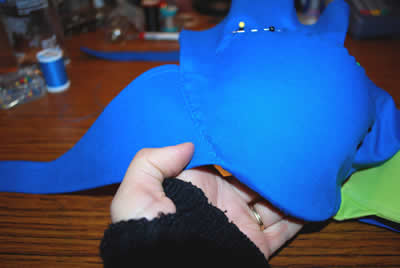
After you have sewn
the bottom edge of the first cup, repeat on the second cup.
Don't pull this fabric too tightly. If you do, it will pull the
cups out of shape.
They should look like two bonnets at this point!
|
|
 |
|
|
|
Now
you are ready to start sewing across the top edge.
Sew a baste stitch across your gathers. (A baste stitch is just
a loose stitch that will hold the gathers in place until you are
ready to sew everything down.)
Do this on both cups.
Remember not to pull this fabric too tightly. If you do, it will
pull the cups out of shape.
|
|
 |
|
|
|
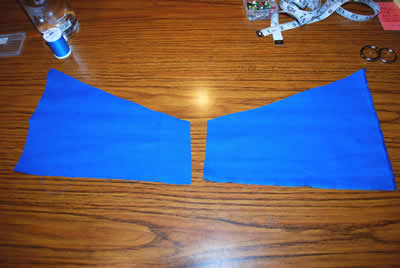
Next,
measure along the outside of the top of the cup (the part that is
normally next to your arm pit) from the top inside edge (on other
side of the shoulder strap) to the top of the outside underwire.
This is your first measurement for your next piece of fabric. In
this example it is about 5 inches.
Next measure across the top part of the cup from the center of the
bra to the top outside edge (from the tip of the underwire in the
center to the outside edge next to your arm pit).
You will need to add at least one inch to each measurement.
|
|
 |
|
|
|
Now
you need to cut two roughly rectangular pieces of fabric. These
will cover the top part of the bra cups. Use the measurements you
just took and add at least one inch to each side.
For this example, my measurements were 5 inches wide by 9 inches
long, so I need two pieces that are AT LEAST 6 inches wide by 10
inches long. If you are in doubt, MAKE IT LARGER. You can always
trim later.
You can cut rectangles or you can cut something that looks more
like this. Just remember to cut these pieces large enough so you
can turn the edges under and sew them down. |
|
 |
|
|
|
|
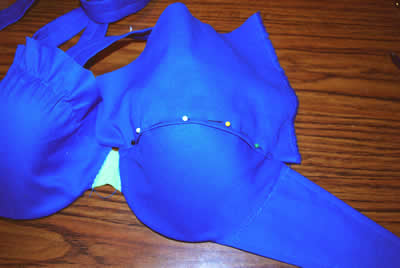
Fold the long bottom
edge of one of the rectangles under and pin across the crest of
the first cup, just below your gathers. The gathers should be
completely covered by this piece of fabric so the cup looks smooth.
Once this piece is pinned in place along this edge, you can trim
the excess from the top of your gathers. Don't trim too close!
You can snip the gathers perpendicular to the pins to make them
lay down flat.
|
|
 |
|
|
|
Once
you have trimmed the top of the gathers, pin the remainder of this
piece into place, all the way around.
Trim excess fabric if there is too much along the edges.
Fold, turn and sew this piece down neatly, it will show on the finished
piece. |
|
 |
|
|
|
I
generally wrap the top of this piece around the top of the cup and
around the arm pit edge. You will need to make snips in the fabric
on the inside to make it lay flat.
Remember not to snip too close to the edge, or bits of your original
bra will show and the fabric will fray/unravel at the cut. |
|
 |
|
|
|
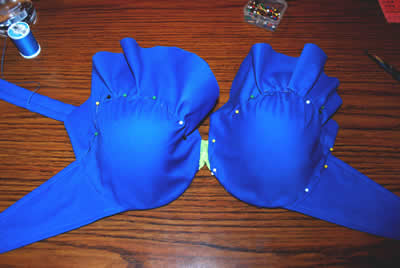
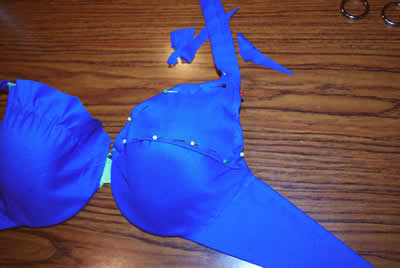
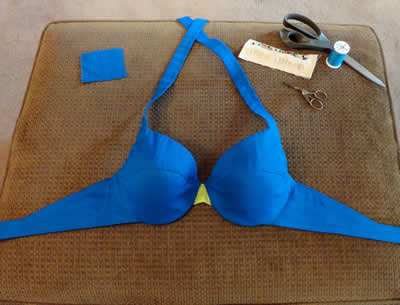
| Your
bra should start to look something like this. |
|
 |
|
|
|
If
you can, with the pins in place, carefully try on the bra to make
sure that you haven't pulled the cups out of shape.
You may need the help of a friend to hold the bra in place or help
repin if needed. |
|
 |
|
|
|
Carefully
sew the top pieces of fabric into place all the way around.
I generally sew the seam across the crest of the cup and the little
part in the center of the bra first with tiny overcast stitches.
I sew the top edge and the under arm edge on the inside of the cup
with a small running stitch.
Around the top strap, I fold the raw edge under and stitch down
so that no original bra or raw edges are showing.
Your bra should look something like this. |
|
 |
|
|
|
The
inside of the bra should look something like this, but probably
not exactly. Every bra is different and no two projects are the
same.
The inside does not need to look neat. In fact, it will get a lot
messier when you start to sew on decorations! |
|
 |
|
|
|
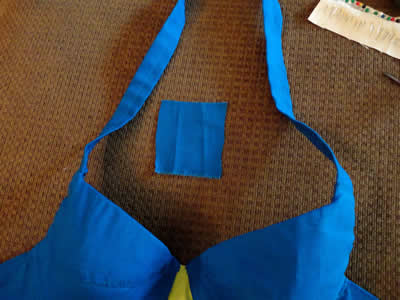
STEP
8 - FINISHING TOUCHES
The only outside part of the original bra that should be showing
at this point is just the little center bit.
Cut a small piece of fabric in a square or rectangle shape large
enough to cover this small area plus a little extra to turn under
and stitch. |
|
 |
|
|
|
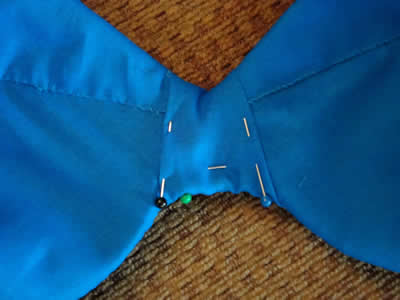
| Fold
the sides under so this piece fits over the uncovered bra center. |
|
 |
|
|
|
| Pin
the sides of this piece in place and wrap the top and bottom around
the bra. |
|
 |
|
|
|
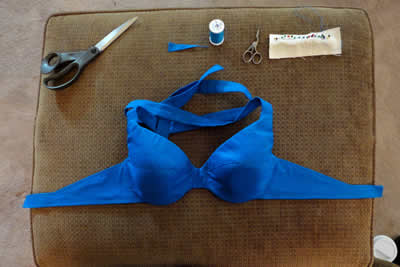
Sew
this last little bit in place.
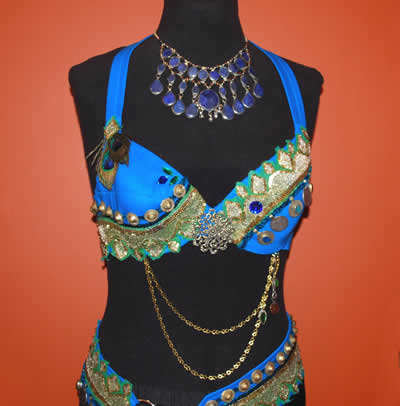
The outside of your bra is now completely covered!!
Add hooks, rings or other closure hardware where needed. |
|
 |
|
|
|
|
STEP 9 - DECORATING
Now you are ready to decorate! This really is the most fun step
in the process. Let your creativity shine! Use anything you want
to decorate your costume. Beads, sequins, fringe, coins, chain,
buttons, flowers, etc.
The sky is the limit.You
have a blank canvas to create whatever you wish.
You can sew your decorations down to the bra by stitching through
to the other side. Add any decorations to the cups and straps
that you want to.
|
|
 |
|
|
|
STEP
10 - LINING
Lining the bra can be done with velvet (very comfy), felt (sweat
absorbant) or the same fabric you used on the outside.
Lining the bra completes the professional look of the piece. It
also covers all the knots and threads and raw fabric edges and makes
the bra more comfortable. But this step isn't completely necessary
since no one else need ever see the inside of your costume.
To line with fabric, cut pieces much the same as you did with the
interfacing. (See STEP 4.) Fold the edges under and stitch into
place.
To line with felt, simply cut pieces in the correct shapes and stitch
into place. You now have a professional looking costume piece and
YOU'RE FINISHED!! |
|
 |
|
|
|
|
|
|